 PhotoCraftTools
PhotoCraft field guide
Edit PSD text in PhotoCraft
This guide uses PhotoCraft Web v0.6.0 and the landscape cover example.Editing is recommended on a desktop browser.
Download the example, open the editor, then use File > Open inside it.
- Download the PSD example.
- Inside the editor, choose File > Open and pick the downloaded file.
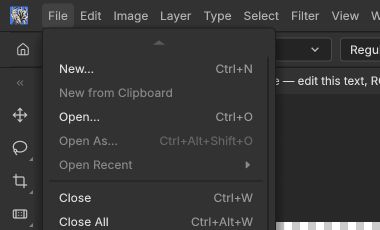
File → Open: choose your downloaded PSD here. - Choose the Type tool (T), click the title, select its text and type your title. Click the checkmark to apply.

Apply your text edit with the checkmark at the right of the text toolbar. - Try a color or layout change if you like.
- Choose File > Export > Quick Export as PNG. Check the downloaded image.
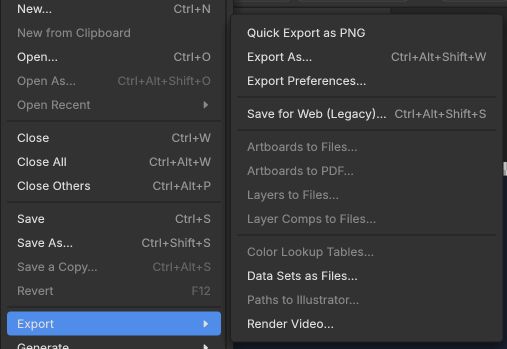
File → Export → Quick Export as PNG.

The title is a text layer named “Title — edit this text”. Selecting that layer alone does not change its text: activate the Type tool, click the title on the canvas, then select the text.
Before you leave
Save or export inside the editor before refreshing, changing renderer or closing the workspace. This site does not automatically save documents or restore them after a confirmed departure. The guide checkboxes in the workspace are your own confirmation.
Troubleshooting
If the editor does not start, keep its internal message visible. Use the workspace's reload option or try WebGL mode after saving your work. If fonts look wrong, use the supplied Inter text example first. Complex layer effects, smart objects and other fonts are outside these tests.
Open PhotoCraft